Friday, November 18, 2011

Making uses out of your Fluff

It's Friday!!! Less then a week till Thanksgiving and I'm sure you've got 151591891065060 other things going on, I know I do. This is a stressful time of year for many people and the best way I deal with my stress is to bake and cook. It doesn't help the waist line that grows for many during this season but it helps me not blow up over stress.

I'm thinking about doing 12 days of cookies next month seeing that I'm going to make a whole lotta cookies for the holiday baskets I give to friends and family. Also going to try some candies too which will be a 1st for those lucky enough to get one. I'm all about making something that can be used in more then one way, like Fluff. It can not only be for fluff n nutter but also a sweet potato bake topper or even S'More Bars.

Growing up getting some s'mores was something truly special as THIS girl doesn't camp, so camp fires didn't happen. There were always the "fake" ones like chocolate chip like cookies paired with a fake marshmallow cream, they would be good at the time but never truly meet the craving of that creamy marshmallow goodness sandwiched between graham crackers with a chunks of chocolate. Here is something I truly believe helps that craving if not kills it totally!

Ingredients:
  • 1/2 cup butter room temp(1 stick)
  • 1/4 cup brown sugar
  • 1/2 cup sugar
  • 1 egg
  • 1teaspoon Vanilla extract
  • 1 1/3 cup flour
  • 1 teaspoon baking powder
  • pinch of salt
  • 3 king sized hersey plain chocolate bars
  • 1 1/2 cups fluff (not marshmallows) or 1/2 of fluff recipe
  • 1 cup Graham Cracker crumbs (you can make these from mashing Graham Crackers)
You want to preheat the oven at 350 degrees. This is for a 8x8 pan but trust me it won't be enough and you can double the recipe and then you use all the fluff you made before. You want to spray your pan because remember you're using Fluff and that stuff is sticky.

You want to mix together your butter and sugars till fluffy, then add your egg and vanilla. It will be light and fluffy.

In a different bowl you want to mix up your flour, graham crackers, baking powder and salt. Once all mixed you want to add this to the butter mixture at a low speed till combined.

Now you want to divided the dough into half, part will be pressed into the bottom of your pan(like the oh so important bottom graham cracker) the other part will be kept aside for later. Next you want to unwrap and place your three chocolate bars on top of dough side by side(it should cover all of it).

Now you see them!
Now you don't!
Next up the Fluff, you can add more if you want but remember you need to add another layer yet, so don't want to have no room in the pan for it. Spread that yummy fluff over your chocolate bars and make sure they are covered(fresh fluff spreads best!).

With the last of the dough you want to place a layer of it over the fluff but fluff is sticky and the dough doesn't like to spread over it so I used a piece of wax paper and made a patch of dough that fit over everything. Then flipped it over onto the fluff stuff and peeled off the wax paper. Worked wonderful for me, hopefully for you too!

After you've got all your layers done pop that baby in the oven for 30-35 minutes till light golden brown. Let it cool before cutting it, I'd say at least an hour... then cut and enjoy! The candybars stay soft after being baked as long as you don't put them in the fridge. It's like some awesome s'mores minus the camping and possible burns from playing with fire.

Enjoy these and check back next week for some more fun!

Wednesday, November 16, 2011

Making Fluff and Cutting Some From Your Life

My Brother in Law NOT CHOCOLATE DADDY enjoying my latest batch of Fluff
Happy Wednesday, wanna know a sandwich that's awesome but taste better if you go the old fashion way to make??? Fluff n Nutter! Now I didn't make Fluff for a Fluff n Nutter but for a different post and I must say it's so much better then what you get in the jar. For those not in the know, a Fluff n Nutter is a sandwich made with Peanut butter and Marshmallow fluff. Sounds amazing to a few different type of people,kids, Big Kids, college kids and well everyone. Think PBnJ but better because as you take a bite out of it one way you can flip it over and take another bite and it's different and better. Doesn't matter how you do it it's still amazing!

Now as far as cutting some things out of your life, I've been working on it the past few months. We've been the type to keep things because you never know when you'd need it... Really like a friend talking about needing ribbon with skulls on it, I had it. Need a pair of footie PJ's with a drop bottom(don't have sock monkeys ones),I've got red ones. I've got lots of things that work for odd ball needs and to tell the truth I don't need it as much anymore. For years I did a little thing called Rocky Horror Picture Show shadow cast. LOVED it but you never knew what you needed and well we (me and Big Tittie Sarah) always kept the trunks of our cars full of things in case it was needed. One night we needed a Brad Costume for a show that was out of town while visiting with friends, We had that Costume and a FULL TIN MAN from Wizard of OZ, both were used that night. I don't get many request for Blue Cowprint chaps, or a wig that's so big it will EAT you anymore.
Big Tittie Sarah(Frank), Carrie(Janet),Laura(Magenta), Myself(Columbia)
So we're working our way thur some of the extra stuff in our basement, it's sad to see some of the stuff go but it's time to replace it with new stuff from Little Miss. When doing this you should go thur a box at a time and be truthful to yourself. You don't need the Adult Footie PJ's that are way too big and could fit 2 of your feet in one of the footies. Some things you can never give away because well NOW the world knows you've got Blue Cowprint chaps and there will always be theme nights for Rocky Horror you need to find a sitter so you can go and enjoy.

Now on to the edible Fluff:

  • 3 eggs whites
  • 1/4 teaspoon cream of tartar
  • 2 tablespoons white sugar

  • 1/3 cup water
  • 3/4 Light Corn Syrup
  • 2/3 cup white sugar
  • 1/2 tablespoon vanilla extract
Things Needed
  1. Candy Thermometer
  2. Small Saucepan
  3. Mixer (you don't want to do this by hand) with metal or glass bowl
Now you're going to be doing two things at once and trust me this is very doable but I must point out you are playing with HOT sugar in this and it isn't be taken lightly as HOT sugar hurts.


Got a LONG way to go!
In a Small Saucepan you want to mix the water, corn syrup and sugar together. Place on Medium with Thermometer in it. It will come to a boil and you want it cooked till 246 degrees or firm ball stage. DON'T over cook!


See it's so fluffy! and it's not even fluff yet!


While that's cooking away it will take some time, you want to use your metal or glass bowl to mix and beat the egg whites and cream of tartar. To get the egg whites you want to do like I've shown in pass entries. you want to go till they are foamy and have at least doubled in size.

At this point we're going to SLOWLY add the 2 table spoons of sugar while still letting it beat away. Once both have been added then you want to Keep the beating going till soft peaks form, Best way to check stop mixer and see if when you pull up your paddle/beater if you get a peak then poke it softly. If it falls keeps going, if it doesn't really do anything then guess what you're where you want to be that that's set!

Back to your sugar on the stove, it should be at the point we want or close. You want to do both at the same time because if you let the sugar set after it's been cooked then you've got some unflavored candy(I'll do sea glass candy some day it's the yummy stuff).

it's mixing fast but my Camera was rocking that day!
You want to turn your mixer on LOW while you add your HOT sugar mixture. PLEASE be careful while adding this mixture to the egg whites. After You've added all of your sugar mixture then you want to turn that sucker on HIGH and leave it on it for the next 5-6 minutes. It will be very fluffy and thick like who would of thought it MARSHMALLOWS. You want to add your Vanilla at this point allow to mix for another 1-2 minutes and then you are DONE!

This makes for a lot of fluff, you can make enough sandwiches for the family and friends or you can save half of this for my next post!!! S'mores Cookie bars, they are so yummy! This does need to be stored in the fridge in a covered container and will keep for 2 weeks.

Friday, November 11, 2011

Chocolate Daddy loves him some Lime so we made Lime Creme Brulee

My Favorite Picture of Chocolate Daddy
I call my husband Chocolate Daddy on here because it's fun, and something he jokingly calls himself. For those that don't know me and him in real life we've got lots inside jokes and keep them for like ever. Inside our wedding band there is even one of our many jokes. We don't claim to know everything about marriage and life but we know you need to grow, learn and laugh with each other. Now we've been together almost 5 wonderful years and done some amazing stuff, we've been to Alaska, Vegas, Boston and New York just to name a few places we've been. He's been with me while I've lost two of my grandparents and dealt with my father's health issues. We've welcomed a beautiful baby girl and enjoy everyday together.
favorite picture from our wedding waiting for dinner at Mario Batali's place there.
He works a lot to it so I can be a stay at home mom and write this blog. Back to the name Chocolate daddy, if you've seen the Movie "Get Him to the Greek" then you've heard the song it from but didn't know it. It's a song about making money. We joke about the money he brings in as Units like record sells and have fun with it. You can listen to the song here

I make a lot of things that I think he'll like or enjoy,because of all he's done for us. When we met he wasn't big on some things, lime being one of them. I changed that by saying "Let's get some Cherry lime aid." I didn't know the door it would open, when we're out and about he wants to try things with lime in them all the time and is more willing to try new things having had that door opened to him.

I've made Creme Brulee a few different times but never with lime. I like to think about baking and cooking with the science in it. Alton Brown does a lot of science thinking and explaining with his cooking and teaching. I trust him when trying to learn something new, he's never lead me wrong. Creme Brulee sounds hard and complex but when broken down it's really easy and you get to play with a torch!

all this makes for yum yum later
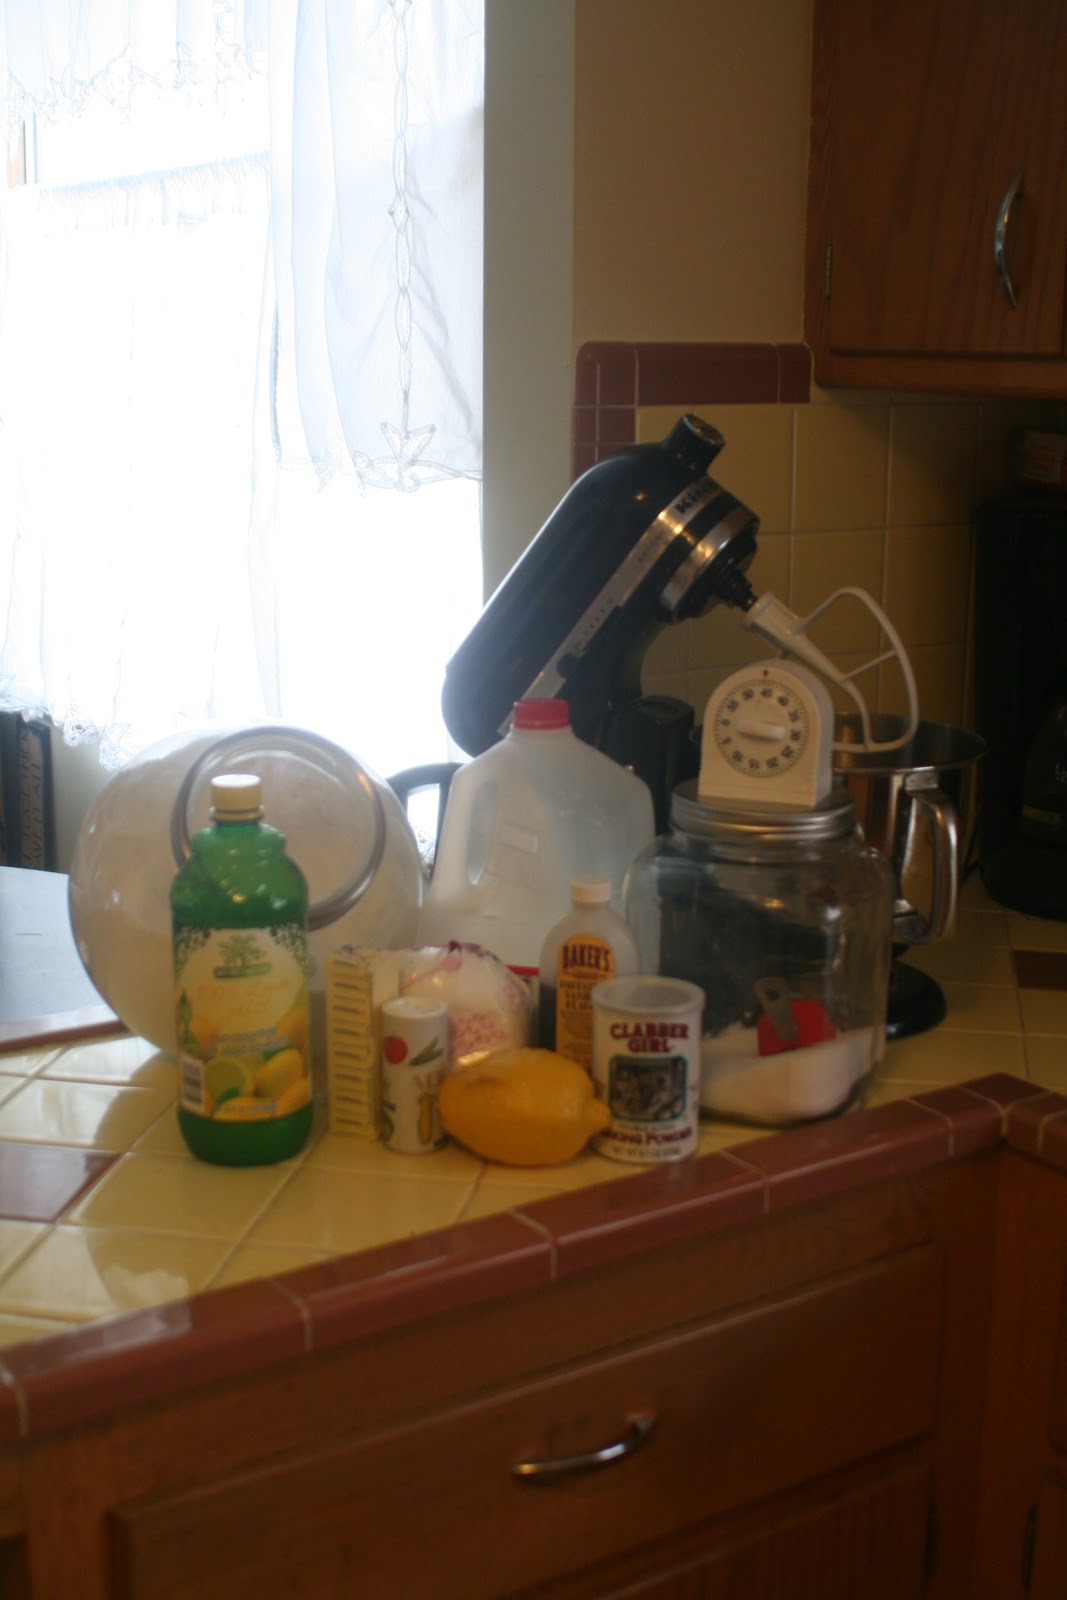
You need:
  • 1 pint of heavy cream
  • 1 vanilla bean (whole)
  • 1/2 cup sugar (plus more for the torching later)
  • 3 egg yolks
  • zest of 2 limes
  1. 4-Ramekins
  2. 13x9 pan
  3. Kitchen Torch

Seems easy right, just a few things to make something wonderful!

Pour heavy cream in to small pan. Zest limes into pan. Again I use my wonderful Microplane to make this easy and fast. Split the vanilla bean and place it in the heavy cream with the lime zest.
Now you put this on the stove at a medium heat, you want to bring this to a boil but not burn the cream. So don't try to make this happen fast because like they say good things come to those that wait, and trust me there is a lot of waiting in this. Once you've got that boil pull it off the heat and set aside covered. Set a timer for 15 minutes. You want at least 15 minute to get the flavors infused into the cream.

Now while you're cream is working away, you're going to be busy with your eggs. They don't sell just egg yolks anywhere that I've found so you need to separate them by hand. They sell tools for this and really it's like the whole juicer thing, something I know they make and I don't need. You can do this with the shell, I think it's super easy and less dishes.
I don't need no stinkin' tool
Once you've got your egg yolks in a your bowl, you add your sugar. You want to BEAT the crap out of the eggs and sugar. When you beat them you're looking for them to turn colors, they are going to go to a paler yellow. I do this by hand because you don't want to over beat and you want to make sure it all gets in the beat. Your egg and sugar mix should look like this:


Now hopefully it's been close to the 15minutes you needed to wait for the cream. If not... then it's okay you can get other things ready like the oven at 325 degrees and get your 4 Ramekins ready in the 13x9 pan. You want to get some HOT water and fill the 13x9 pan to about midway up the Ramekins.
water bath!
Next we're going to remove the vanilla bean from the cream at this point I remove the seeds from the vanilla bean by running it thur a fork. It adds more flavors and people will "OHHH and AHHH" at the fact they can see the little black spots from the bean. You will just use the fork to mix it into your cream/zest mix.

Are you wondering if I'm going to make you eat the zest? Nope because next we're going to use a fine mesh strainer and strain this mix into your eggs, but you're not going to mix it all at once because it would of "cook" your eggs so strain a little and beat it with your whisk. You want to keep going back and forth with strain/beat till all your cream mix has been strained.
Here is the start
still working on it
all in just mixing
Once everything has been mixed it's time to pour into your ramekins that are already in the water bath. you want to pour equal amounts into each. Once you've got your cream mix poured you're ready for the oven. You are going to bake them for 50 minutes.

scary oven someday i'll get a shiny new double oven *dreams*

Waiting sucks but like I said you wait a lot for this,but on the good side of things you can make this the day before if you're having company or a get together then you get to show off your torch skills to others. Oh yeah I haven't told you after that 50 minutes in the oven there is still more waiting haha... Also if you haven't noticed I like the torch haha. We bought it to make s'mores with, and Chocolate Daddy won't let me have a full sized torch.

So the 50 minutes is done and you've pulled your Creme Brulee, that's right it's now Creme Brulee. Just not fully set yet. I always give it 10 minutes to cool outside the oven before pulling the ramekins and placing them in the fridge for the next 2-3 hours. They can be kept for 3 days but wrap them after the 2-3 hours. I said there was more waiting.

Yep that's Creme Brulee next to iced coffee and sweet tea
Once you've waited for everything to set it's time to torch, you can use other things like lighters but it's not the same and you can mess things up. You want to use regular everyday sugar, I know some people are all you need blah blah sugar, they lie. Pull your Creme Brulee from the icebox and let it set out for 30 minutes.

just hanging
After waiting the 30 minutes you want to sprinkle sugar on top and shake it around so you have a thin layer so you can get that scorched sugar layer. Time for the torch!!!
Torch!

You're going to set the torch to continuous and start on the outside ring of the ramekin moving in circles towards the center. You want light to medium brown for color on the sugar. Caramelized not burnt.
you know you want to eat it lol.
Now you only have to wait 5 minutes so you don't burn your tongue. You can change this up to have a Lemon or Orange flavor by just using the zest of either in place of the lime zest. This is a wonderful dessert that more often then not is only found in fancy restaurants. I serve it with fruit as this is a very rich dish and you can pick how you pair.

My Chocolate Daddy and our Little Miss moments after she joined our family.
Chocolate Daddy LOVED it and so did our friends who I had try it. I'm always out to try new things and see how I can make them better or easier for others to do. I'm always open to questions and ideas for things to make. Working on a few different ideas for next week and hope I can keep the balance between blog, babe,wife and friend. Now I'm off to make some yummy cookies because it's cold here in Cheeseland.

Wednesday, November 9, 2011

Crack Bread = The Best Lemon Raspberry Bread SO Addictive it's like Crack

yep my baby the crack bread addict not sure where that raspberry is going.


So about two months ago I was making breads. The normals, pumpkin, zucchini, banana, and some not so normal blueberry zucchini, raspberry banana, cider pumpkin with craisins but something was missing. At the request of a friend who wanted a good lemon raspberry bread, I went on a mission. Out there in the flavor world there are good flavors and bad/fake flavors. There are the wonderful lemon flavors out there and I've found some of them in yummy cookies, lemon bars, cakes and the like. In that same note some of those same things have the fake/bad flavor in them. Remember Lemons have a bitter bite to them, you should get that bite in everything but the good flavor has it paired with sweet.

We have friends who love a Local place that makes Lavender Cupcakes, one had them for her birthday get together. I can't say how they taste as I'm allergic to Lavender, and don't want to die. I've heard they are awesome and Chocolate Daddy liked them. This same friend said this bread is better then them. This same person even STOLE some of this bread from their husband. I now have to bring his and her loaves when I bring over Crack Bread. It's because of this friend we call this Crack Bread she's an Addict and I keep feeding her with it.

So on to the good stuff now:


  • 1/2 cup butter- softened
  • 1 cup Sugar
  • 2 Eggs
  • Juice of 1 lemon
  • Zest of 1 lemon
  • 1 1/2 cups of all-purpose flour
  • 1 teaspoon baking powder
  • 1/8 teaspoon salt
  • 1/2 cup milk
  • splash of vanilla
  • 1- 1 1/2 cup raspberries
GLAZE
  • 2 tablespoons lemon juice
  • 1/2 cup powder sugar


First thing 1st preheat oven to 350 degrees.

While the oven is preheating you need to zest and juice your lemon. I've got all types of fancy tools but no juicer... never asked for one either but I've got the best tool for zesting, a microplane. They work wonders, they can be used for so many things from working with ginger and garlic to zesting and grating cheeses.   I always put the zest and juice in the same bowl as you mix them up at the same time.            
Watch for seeds no one wants to eat them.


In your Mixing bowl you want to mix Butter and sugar till creamy, then add your eggs and vanilla, mix again. Then add your Lemon stuff and mix again.


While the above is mixing combine your Dry stuff. Once everything in the mixing bowl is mixed up you're going to take your 1/2 cup milk and dry stuff and mix them into the lemon mix by doing half the flour, half the milk, rest of the flour and rest of the milk. Then mix till everything is combine.

like so

Now comes the raspberries! I always use frozen raspberries, even if you just bought some fresh ones freeze them so they don't fall apart while being folded into the batter. This is also a great reason to stock up on them when they are on sale.

You want to measure them out, you can use more them what I've said or less your choice and remember the more you put in the stronger the flavor becomes and  more chucks. I always do between a cup and a cup and a half.


You want to fold these in. DON'T use a mixer as the Raspberries will break up, and it just don't taste right so don't do it. After you've done this it should look like this:
yummy
 Now you want to grease your pans, again I use the spray with flour already in it. You can use whatever you want but if it sticks then try again but with the spray stuff I swear by it. Then you want to fill your pans with the batter... as always I make 3 mini loaves but this will make 1 normal loaf.


Pop these bad boys into the oven, mini loaves 35 minutes, normal loaf 45-50 minutes. You should always test your bread to make sure it's done. This is more like a pound cake as I've heard so it doesn't rise as much as one would think. With the Normal loaf  put the loaf pan right into the oven, every time I make it with a pan under it it turns out weird. By weird I mean raw in the middle after an hour.

While they bake you want to make your glaze. If you have an extra lemon laying around you can juice it, if not then just use the juice you can buy in the store. You mix the powdered sugar and juice together to make a thick milky looking goo, like this:


After your bread is done pull it from the oven and give it about 2 minutes to cool in pans. You want to have some surface prepped for the bread to be placed on. You need to be careful and flip out your bread onto this surface.

looks easy but i use 2 oven glove thingys
Now you want to pour your glaze over your bread and it will pool some no worries.


Now you want to let them cool so you can enjoy!
look WHOLE raspberries!!
Now you know how to make Crack bread. Please note there is no crack in Crack Bread nor do we say you should add it because CRACK IS WHACK! This is just another great thing to make for your family and friends. I hope your family enjoys it as much as mine.

Monday, November 7, 2011

WHAT??? Bananas, Peanut butter and Reese's all in one... Why Yes!


So I've been a slacker but the past month has been crazy busy and now things are settling down. I've been working and thinking how to write these post as I'm learning a new form of work- life balance that they are always yapping about when you start a new job or your boss hears you're working 516518916 hours a week. Sundays are baking/crafting for my blog days, Chocolate daddy is home and Little miss is all his... This isn't always a good thing as that means he gets to dress her too(see this weeks opening picture, SCARY!)

Now I must ask that you forgive the pictures to start with because, well my camera operator(myself) didn't think to check the focus and the camera in general. They do get better as they go on I swear! Sundays are normally PJ day here, Little Miss got oatmeal all over hers while Mommy was out shopping and that left Chocolate daddy to picking out clothes... but I love them both anyways... on to the post.

I've got a new obsession called pinterest. I love it and check it almost daily. It's full of wonderful ideas for baking, crafts, things to do with kids, funny sayings/pictures and many other things you could just fall in love with so easy. I'm on there and feel free to follow me (JNCBH) but I don't always repin what I find. This new Bread I found on there. It sounded like something Chocolate Daddy would like so I made it. 1st go around it wasn't the best as to get it "done" it had burned on one side, 2nd turned out wonderful and awesome.

Everything to make to wonderfully yummy bread!

Like I said before I found this on a different website, and this is my take on it... I've changed a few things and also made mini loaves as I like to share the wealth of calories.. err... umm I mean goodness. Yeah, Goodness!! Here's a list of the goods needed to make this goodness.

  • 3 very ripe bananas, mashed
  • 1/2 cup peanut butter
  • 1/4 cup oil
  • 1/2 cup granulated sugar
  • 1/3 cup brown sugar
  • 1 1/2 cups of all purpose flour
  • 1/2 tsp baking soda
  • 1 1/2 tsp baking powder
  • 1/2 tsp salt
  • 8 oz bag of Reese’s Mini cups
  • splash of vanilla

Now onto the mixing and all that jazz, 1st preheat the oven to 350 degrees. You can wait till later but in case you didn't notice there are no eggs and you can't use the whole "you'll get sick so don't eat the batter" thing to keep fingers out of it after it's made. BTW the batter is awesome.

After that mix the bananas, butter and sugars together, then add the oil, peanut butter and vanilla. While you let that all mix and cream together mix your dry stuff in a separate bowl.

Once all the "wet" stuff is mixed add in your "dry" stuff little by little(remember scrape the sides of your mixing bowl). While all this is going on I grease my pans, remember I use mini pans it makes about 3 but will only make 1 "normal" loaf. I use that whole spray with flour in it because it ROCKS! or you could ya know use butter and sprinkle it with flour and get the same thing just more work... Cheaper but still more work...  

Now back to the task at hand. You've got everything mixed and ready to go so you're going to fold in your Reese's cups. These are the new ones that don't have the wrappers or anything on them, they are a little thicker "skinned" too so they bake well. If one or two fall in yours or someone else's mouth it's not going to hurt this just so ya know.

BEFORE!!
AFTER
After Folding in your cups, pour into your pan(s) and then we're going to the oven for some lovin'. Mini Loaves bake for approx 30-35 minutes, Full sized loafs approx 55-60 minutes. Test them at either 30 or 55 depending on what size loaf you're making.

Ready for some oven lovin'

30 Minutes later!
You'll wanna leave them in the pan to cool for about 5-10 minutes. The peanut butter cups can make them stick to the side of the pan so feel free to run a knife around the edges of the pan. Pop them out to finish cooling because burnt tongues from peanut butter cups suck. While waiting for this to cool you can do things like:
teach the little ones to read, climb book shelves, cook, or just be so damn CUTE.

When cooled and ready to eat your bread should look something like this:

So enjoy this treat and share with others... Hell Pin it if you want on Pinterest....